A monthly e-newsletter from UMass Extension, published March to October, for home gardeners.
To read the articles in each section of the newsletter, click on the section headings below to expand the content:
Tips of the Month
June is the Month to.....
-
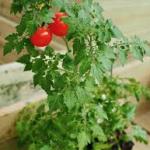 Plant heat loving crops. Tomato, pepper, and eggplant transplants prefer warm soil temperatures and should not be planted before soil temperatures reach 60 degrees F, which typically occurs in late May to early June. Cucumbers and melons can also be planted at this time from young transplants or by directly sowing seed.
 -
Provide adequate space for tomatoes to grow. Tomatoes should be grown in rows that are at least 5’ apart. Spacing between plants should be 12-36”; depending on how vigorously pruned (removing suckers) they are, the variety, and the method of growing. Tomatoes trellised and pruned to a single stem can be planted ~12” apart, staked plants with 2-3 leaders should be spaced ~24” apart, unpruned caged plants should be planted at least ~36” apart.
-
Pinch the soft growth of perennials like chrysanthemum, aster, and joe pye weed. Pinching will create mounded plants with more blooms.
-
Stay vigilant with weeding. Warm season annuals are still germinating and, if you let your guard down, weeds will take over. In the vegetable garden, use shallow hoeing to kill small weeds or mulch to prevent germination. Use mulch in perennial and other garden beds - just beware mulch will not control perennial weeds or weeds that have already germinated. Do not use compost – it does not make a good mulch because compost often contains lots of viable weed seeds.
-
Increase the height of your mower to 3” during the hottest driest summer months. Remove no more than 1/3 of the grass blade when mowing, leave your grass clippings on the lawn, and mow when the lawn is dry.
-
June is often the month when watering and irrigation needs start to increase. For lawns, the best way to irrigate is deeply and infrequently. Deeply means to the rooting depth, typically 6-8” or more. Infrequently means allowing the lawn to be slightly water stressed before irrigating. An easy way to determine when slight water stress occurs is by walking on your lawn. In a slightly water stressed lawn, footprints will remain visible several minutes after walking on the grass.
-
Pay extra attention to recently planted shrubs and trees. Most shrubs and trees will require supplemental irrigation for at least the first entire growing season in order to become established.
-
Monitor plants on a regular basis. Take the time to look closely at your plants, looking at the undersides of leaves and at the growing points – a large magnifying glass can be a useful aid. Catching potential problems before they get out of hand is crucial to successful management of any insect or disease problems.
-
Hill potatoes. Hilling potatoes allows for quick emergence and optimum depth for tuber production. Potatoes should be hilled with 3-4” of soil when there is 6-8 inches of growth above the soil. Create a broad hill and hill the potatoes until the original seed potato depth is about 8-10” deep.
Russ Norton, Agriculture & Horticulture Extension Educator, Cape Cod Cooperative Extension
Timely Topics
Caring for Houseplants in Spring and Summer Months
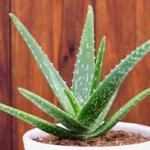
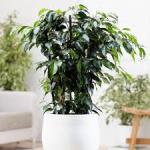
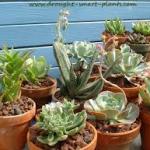
Proper care of houseplants helps increase their enjoyment and also extends the blooming period of flowering houseplants. Creating an ideal environment for houseplants creates a lasting enjoyment. Some of the steps to keep the houseplants healthy include: increasing humidity during winter months when the air indoors tends to be drier, repotting plants that have outgrown their containers, and proper watering and fertilization during warmer months when plants are actively growing. During fall and winter months, watering and fertilization should be reduced to correspond with the decline in plant growth.
Repotting
When houseplants outgrow their pots, they should be repotted into larger containers. Some of the indicators that plants need to be repotted are: roots begin to grow through the drainage holes, roots appear on the soil surface, the soil mass is filled with roots, new leaves are smaller than normal, and plants wilt between waterings. The best time to repot houseplants is in the spring when plants are actively growing. This allows plants to become established in the new medium quickly. When repotting a plant into a new container, make sure the container has drainage holes. Use a sterile potting mix and make sure the plant is repotted at the same depth it was growing in the old container and leave a little room at the top of the container for easy watering.
Watering
Many houseplants suffer from too much or too little water. The amount of water a plant requires depends on both the plant’s characteristics and the environmental conditions in the house. There is no general schedule that can be used for watering all houseplants. Larger plants with larger leaves require more water and should be checked more often than small plants with smaller or fine leaves. Other factors that influence the amount and frequency of watering include light intensity, relative humidity, size and type of container, and the characteristics of the potting mix. Check plants frequently to ensure that the potting mix is kept moist. Avoid keeping it too wet or too dry since this can cause plant roots to die. Never allow plants to wilt. You can determine if a plant needs to be watered by sticking a finger into the potting mix up to the first knuckle and feeling if the potting mix feels dry. For a more accurate test, you can purchase a battery powered moisture meter to determine when plants need to be watered.
Fertilizing
Houseplants need to be fertilized to ensure proper growth, especially during the warmer months in late spring and summer. Most houseplants grow slowly, so they don’t they require much fertilizer. Most houseplants will not need to be fertilized more than once every one to three months. Use complete fertilizers labeled for houseplants. A good fertilizer ratio to choose is 1:2:1, such as 5-10-5, 10-20-10. Follow the directions on the fertilizer label. Do not use a higher nitrogen fertilizer when plants are in bloom since this will lead to more foliage production and fewer flowers. Do not overfertilize. This can result in soluble salt damage in the plants (injured roots, stunted growth and yellowing of leaves). To avoid salt buildup in the potting soil, it may be necessary to periodically flush the soil to leach out soluble salts that have built up over time from fertilizer use. To flush the soil, add plain water to the container approximately 4-5 times the soil volume to push the salts through the drainage holes in the bottom of the container.
Lighting
Improper lighting can be a cause for houseplants to fail. The amount of light required for optimum growth and development varies with different types of plants. The most common light requirement is between 12 to 16 hours/day. Consult the plant tag or a book on houseplants about the specific light requirements for your plant. If the source of light is a south, east or west facing window, rotate the plants often so that each side faces the light to prevent lopsided growth. Fluorescent lights placed above the plants will improve their growth if the plants cannot be placed close to the window. Fluorescent lights should be placed about one foot above the top of the plants.
In late spring or early summer, houseplants can be moved outdoors. When moving plants outdoors, slowly introduce them to full sunlight to prevent them from getting damaged or scorched. First, place the plants in a sheltered spot on a porch or beneath a tree close to the house, preferably when the weather is cloudy. After one week, the plants may be moved to a more exposed spot for the rest of the summer.
Insect and Disease Control
Check your houseplants often for insect or disease problems. If detected early, these can be easily corrected before serious damage is done. To effectively manage disease and insect problems, you need to properly identify the problem. Plants that are under stress are more susceptible to disease infection and insect and mites damage. Make sure your plants are growing under proper cultural conditions i.e. proper light, temperature, water, fertilization, humidity and air circulation. Many houseplant insect and mites pests can be controlled by washing the plant with a vigorous jet of water. This is particularly effective for spider mites and aphids. Plants with hairy leaves such as African violets should not get wet, but the pests can be wiped off with a soft cloth or a soft brush. Most insect pests of houseplants can also be controlled by sprays of insecticidal soap or horticultural oil. Be sure to also spray the undersides of leaves. Follow the directions on the label.
Cleaning houseplants
Houseplants get dusty. For plants to adequately photosynthesize and make the sugars necessary for growth, the leaves should be cleaned regularly. Plant leaves can be cleaned with a soft damp cloth or a damp sponge. Use plain, room temperature water. Plants with hairy leaves, such as African violets, and also cacti and similar plants should not get wet. Use a soft brush to dust the leaves, spines and stems.
Care while away
When you travel for vacation, it’s nice to have someone check your plants every few days. If you can’t find someone to do this, you can use self-watering wicks which go into a container of water on one end and into the soil of the plant on the other, drawing up water as the plant needs it. You can also purchase an automatic self-watering system with a timer for your plants. There are sophisticated self-watering systems available that are able to run on 10, 20, 30 and 40-day programs that adjust at the turn of a dial.
Geoffrey Njue, UMass Extension Sustainable Landscapes Specialist
News for Gardeners
Iris Leaf Spot
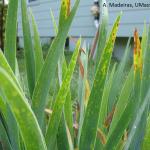 Iris leaf spot is one of the most common diseases of irises in the landscape. It is caused by the fungus Cladosporium (Heterosporium) iridis, formerly known as Mycosphaerella (Didymellina) macrospora. The disease has also been reported on Narcissus, Gladiolus, Freesia, and Belamcanda. The cool, wet weather this spring was highly conducive to disease development, and symptoms were observed locally beginning in late April.
Iris leaf spot produces tan, oval lesions with margins that may appear water-soaked at first, but then turn a reddish brown. Lesions first appear at the leaf tips and may eventually coalesce, resulting in a burned or blighted appearance. The dark spores of the fungus may be visible in the middle of lesions with the aid of a hand lens. Spores are spread by wind and splashing water, and germinate at 50-77oF. The disease can progress throughout the growing season as long as the environmental conditions are right.
Iris leaf spot does not kill plants, but can make the foliage unsightly, and chronic infection may eventually weaken plants. The fungus overwinters in dead leaves and produces new spores in the spring, so strict sanitation is critical for disease management. Improve air circulation through proper plant spacing and avoid overhead watering. Bearded (German) iris is highly susceptible, but Siberian iris is largely immune to this disease, and it has not been reported on Japanese iris. Non-susceptible perennials may be planted in front of irises to shield the foliage from view later in the season.
Angela Madeiras, UMass Extension Plant Pathologist
Trouble Maker of the Month
Viburnum Leaf Beetles at Work
Note: The larvae of viburnum leaf beetle were seen actively defoliating entire plants at a location in Amherst, MA on 5/29/19.
The viburnum leaf beetle (Pyrrhalta viburni) is a beetle in the family Chrysomelidae (the leaf beetles) that is native to Europe, but was found in Massachusetts in 2004. This insect was initially reported in North America in 1947 in Ontario, Canada. Since then, it has been reported in the United States in parts of Maine, New Hampshire, New York, Ohio, Pennsylvania, Vermont, and Washington. This beetle feeds exclusively on many different species of viburnum, which includes, but is not limited to, susceptible plants such as Viburnum dentatum (arrowwood viburnum), V. nudum (smooth withered), V. opulus (European cranberry bush), V. propinquum (Chinese evergreen viburnum), and V. rafinesquianum (downy arrowwood). Some viburnum have been observed to have varying levels of resistance to this insect, including but not limited to V. x bodnantense (Bodnant viburnum), V. carlesii (Koreanspice viburnum), V. davidii (David viburnum), V. plicatum (doublefile viburnum), V. rhytidophyllum (leatherleaf virbunum), V. setigerum (tea viburnum), and V. sieboldii (Siebold viburnum).
One generation of viburnum leaf beetles occurs per year. The adult female beetle lays up to 500 eggs in pits they chew in viburnum twigs in the summer and early fall (beginning roughly late-June to mid-July through as late as October or until the first killing frost). These egg laying sites are approximately 1 mm. in diameter, and usually (but not always) made on small, current season’s branches or twigs. That said, it is best to look at the tips or ends of branches for viburnum leaf beetle egg sites. Approximately 8 eggs are laid in each pit, which is then backfilled by the female beetle with chewed bark, excrement, and reportedly, a special “cement” they make. This makes the egg pits look brownish-black when compared to the greenish/brown bark of the twig. Capped egg pits are typically created in rows. These eggs are the life stage that overwinters, hatching in the spring (approximately late April to early May).
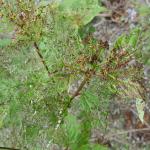
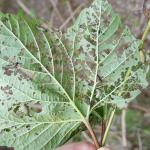
Larvae (immature insects) that hatch from these eggs conduct their feeding through early summer. They begin feeding by skeletonizing the underside of the leaf, typically leaving the midrib and large leaf veins behind. Newly hatched larvae may be about 1 mm. long and greenish-yellow or off-white in color, lacking spots. Viburnum leaf beetle larvae undergo 3 instars (3 stages between which they shed their “skin”). Second and third instar larvae are yellowish-brown with black spots and may be ½ inch in length upon maturity. If the infestation is large enough, as the larvae grow in size, they may completely defoliate the shrub. They then are reported to crawl down the shrub to the soil where they pupate. Pupae are very difficult to find, as this stage occurs in the soil. Moist soils are considered a favorable environment for this insect; if it is too wet or too dry, pupae may not survive as well.
Adults emerge from the soil by midsummer (typically early July, but sometimes by late June), feed again on viburnum foliage, mate, and females lay the eggs that will overwinter to provide us with a population of viburnum leaf beetles the next year. These adults are capable of migrating to new, previously not infested plants. The transition from egg hatch to adulthood can take 8-10 weeks. Adult beetles are brownish-yellow in color and approximately ¼ inch in length; females are larger than males. Unlike the skeletonized damage the immature larvae cause with their feeding, adult beetles create irregular, circular and sometimes elliptical holes in the leaves while feeding.
How to Manage Viburnum Leaf Beetle
If you have this pest on susceptible viburnum species or are looking to plant viburnum in your landscape, it is best to start with the resistant species of viburnum listed above, or remove and replace susceptible species with those that are resistant in areas where this insect is problematic.
If you have a small viburnum leaf beetle population, where entire shrubs are not yet being defoliated, mechanical management options exist. Prune and destroy infested twigs and branches (those with capped egg sites) over the winter. These egg laying locations are especially easy to see when the viburnum have shed their leaves. Prune and destroy these twigs. In small scale infestations, adult beetles can be hand collected and dropped into a can of soapy water. (Beware, they will drop to the ground when startled, so use this behavior to your advantage. Place your can of soapy water beneath them and gently tap the branch to get them to drop into the water below.) It has recently been discovered that larvae do not drop from the leaves to pupate in the soil, but rather crawl down the shrub to do so. This may make them vulnerable to sticky barriers placed around the base of individual shrubs.
Larvae, particularly newly hatched ones, may be treated with a product containing spinosad or insecticidal soap. Both of these reduced risk options require direct contact with the larvae to be effective. Other insecticidal options are available to manage this pest; however, some (depending upon the active ingredient) may pose greater risk to beneficial insects. For assistance managing viburnum leaf beetle, contact a Massachusetts licensed Pesticide Applicator.
For more information about this insect, go to http://www.hort.cornell.edu/vlb .
Tawny Simisky, UMass Extension Entomologist
Plant of the Month
Hydrangea quercifolia, oakleaf hydrangea
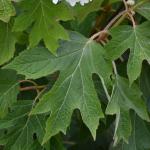
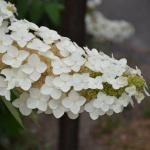
Although less planted than Hydrangea macrophylla and H. paniculata, Hydrangea quercifolia provides multiple seasons of interest and is a great addition to the landscape. Native to the southeastern United States, Hydrangea quercifolia is a multi-stemmed, mounded shrub reaching 4-8’ tall (although plants can reach 12’). The common name, oakleaf hydrangea, comes from the oak-like leaf shape. Leaves are 3-8” long, 3-7 lobed, and have serrated margins. The coarse foliage is dark green above with a white to tan underside. Fall color is an attractive blend of red, red-purple, and sometimes orange with leaves holding late into fall. Flowers are upright, pyramidal clusters of white flowers. Similar to other Hydrangea species, panicles contain small fertile flowers along with showy sterile flowers near the base of the clusters. Peak bloom is early July, with flowers turning pink as the age in late summer. Older stems have exfoliating bark that provides winter interest.
Plants are best grown in a well-drained, moist soil in full sun to part shade. Mulching helps to retain moisture. Pruning is not often needed, but plants should be pruned immediately after flowering when needed. Hydrangea quercifolia can suffer from twig kill and flower bud injury in zone 5, so plants should be protected in winter. Bark, flower buds, and leaves are poisonous. Hydrangea quercifolia can be planted as a specimen or can be used en masse or to make an informal hedge. Best planted where the exfoliating bark can be enjoyed in the winter months. Oakleaf hydrangea has no serious insect of disease problems.
Cultivars include:
- ‘Alice’ – large, arching flower panicles, improved fall color
- ‘Snow Queen’ – larger, more numerous sterile flowers that are more upright
- ‘Queen of Hearts’ – flowers later than most cultivars; hybrid of Snow Queen and Pee Wee
- ‘Pee Wee’ – compact cultivar, smaller size, leaves, and flowers
- ‘Ruby Slippers’ – hybrid of Pee Wee and Snow Queen, smaller size; flowers mature to ruby red
- ‘Little Honey’ – leaves emerge golden yellow in spring; change from yellow to chartreuse to green by early fall before turning red
Mandy Bayer, Extension Assistant Professor of Sustianable Landscape Horticulture
Additional Resources
Landscape Message - for detailed timely reports on growing conditions and pest activity
Home Lawn and Garden Resources
Find us on Facebook! www.facebook.com/UMassExtLandscape/
Follow us on Twitter for daily gardening tips and sunrise/sunset times. twitter.com/UMassGardenClip
Diagnostic Services
The UMass Extension Plant Diagnostic Lab provides, for a fee, woody plant and turf disease analysis, woody plant and turf insect identification, turfgrass identification, weed identification, and offers a report of pest management strategies that are research based, economically sound and environmentally appropriate for the situation. Accurate diagnosis for a turf or landscape problem can often eliminate or reduce the need for pesticide use. Sampling procedures, detailed submission instructions and a list of fees.
The UMass Soil and Plant Nutrient Testing Laboratory at the University of Massachusetts Amherst provides test results and recommendations that lead to the wise and economical use of soils and soil amendments. The Routine Soil Analysis fits the needs of most home gardeners. Sampling procedures plus the different tests offered and a list of fees.
Spread the Word!
Share this newsletter with a friend! New readers can subscribe to our Home Gardener E-Mail List.
